

It’s the end of the day, and you discover you have a flat tire. A nail has punctured the tread. You open the hatch, lift the cover, and instead of a spare tire, you find that your Hyundai has tire sealant and an inflator.
Its called a tire mobility kit. Kits like this are increasingly common. Eliminating the spare tire reduces weight and increases fuel economy. Using the kit is much easier than changing a tire. And it can temporarily repair small punctures.
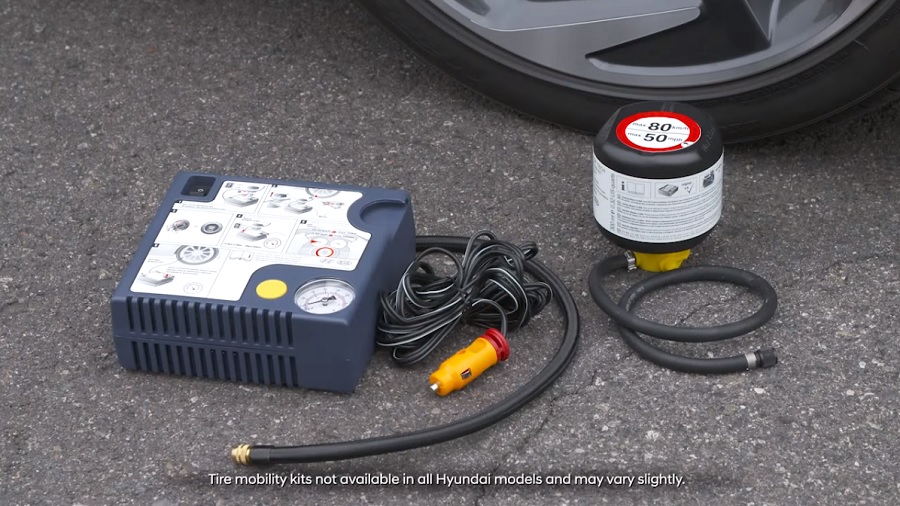
Components of the kit
- A speed restriction label to be affixed to your steering wheel once the kit has been used.
- The sealant bottle.
- The filling hose that connects the sealant bottle to the tire.
- A compressor to pump sealant and air into the tire.
- The compressor’s hose.
- The compressor’s housing for the sealant bottle.
- The cable that connects that compressor to the car’s power outlet.
- A gauge to display tire pressure.
- And a button to reduce tire pressure, if necessary.
How to use the kit
Connecting everything
Here’s how you use the kit to seal a puncture. Shake the sealant bottle. Screw the compressor’s hose onto the sealant bottle. Insert the sealant bottle into the compressor housing. Make sure the bottle is upright. Unscrew the valve cap on the flat tire. Screw the sealant bottle’s filling hose onto the valve.
Turning it on
Make sure the compressor’s power is switched off. Plug the compressor’s power cord into the vehicle’s power outlet. Start your vehicle if you switched it off. Switch the compressor on and let it run for five to seven minutes.
Maximum running time
To avoid over inflating the tire, do not let it run longer than seven minutes. Also, stay away from the tire while it is being filled.
Finishing up
Switch off the compressor. Unplug it from the vehicle’s power outlet. Detach the filling hose from the inflated tire. And the compressor’s hose from the sealant bottle. Remove the speed restriction label from the sealant bottle and affix it to your steering wheel. Return the tire mobility kit to it’s storage location in the vehicle.
Immediately drive the vehicle four to six miles, or about 10 minutes, to evenly distribute the sealant in the tire. Then, stop at a safe location to check tire inflation.
Check tire pressure
Connect the compressor’s hose directly to the valve of the inflated tire. Check the pressure gauge to see if the tire pressure is within the correct range listed on the sticker in the door frame. If the pressure is too high, press the button for reducing tire pressure until it is within the correct range.
Turn on compressor again if pressure is low
If the pressure is too low, make sure the compressor’s power switch is off and plug it’s power cord into the vehicle’s power outlet. Start your vehicle if you switched it off. Switch on the compressor. After approximately five seconds, switch the compressor off and check the pressure. If it is still too low, switch on the compressor for another five seconds. Repeat this process until tire pressure is in the correct range.
Restricted driving after using repair kit
After the tire is properly sealed, you may cautiously drive the vehicle for up to 120 miles at a maximum speed of 50 miles per hour in order to reach a service station or tire dealer for repairs or replacement.
It is possible that some tires, especially those with larger punctures, can not be properly sealed. Do not try to seal a tire with damage to its sidewall. One sealant bottle may be used to seal one tire only. By following these instructions, you will be on your way with a minimum of inconvenience.


